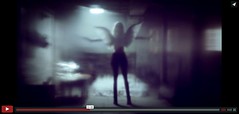
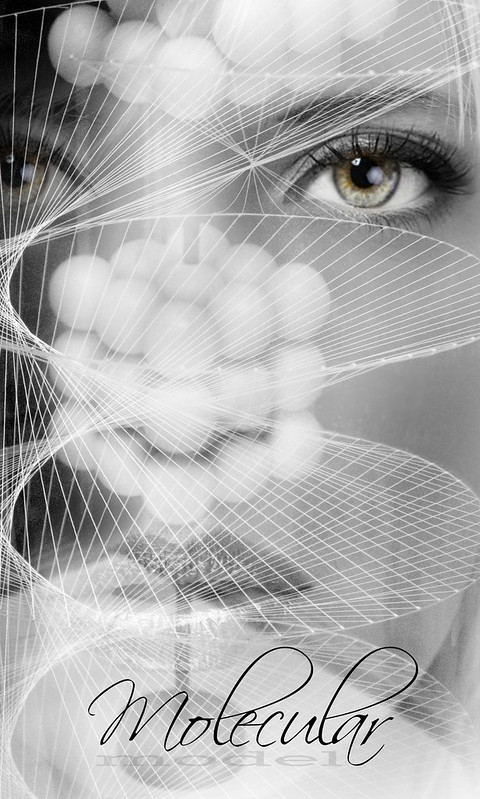
There are several ways to add textures to an image. Many times you want to enhance the feel of something or bring attention to it in some way. Texurizing works ver well for that. I nvere do it ove the entire image either, although you sure can if you want to. I like to select portions to have the texture contained within. Just use the tools for selecting and you shouldn't have any trouble at all. That first image incorporates a very complex grid pattern and blends it very softly into the woman. I initially used the Lighting Effects filter to make it become the color I wanted for this piece. I had a yellow light and the ambient color set for orange. I used the Spotlight setting for the light and played around with it until I liked the look. Then I carefully cut out the model from the original background she was in. I used the Pen Tool for the selecting. As I've mentioned before the pen tool makes a very precise and hard edge to the selection, which it is supposed to do as often times you need that. But, for this piece the model's skin edge is a little softer, so we needed to sdjust that through feathering. That is further explained here if you are not familiar with the procedure...
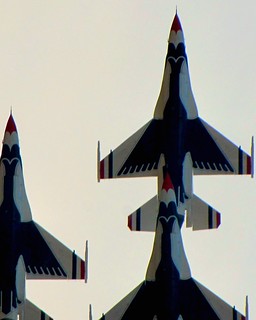
Thunderbirds2| flickr.com | gwennie2006
...and these screen caps may help some too...
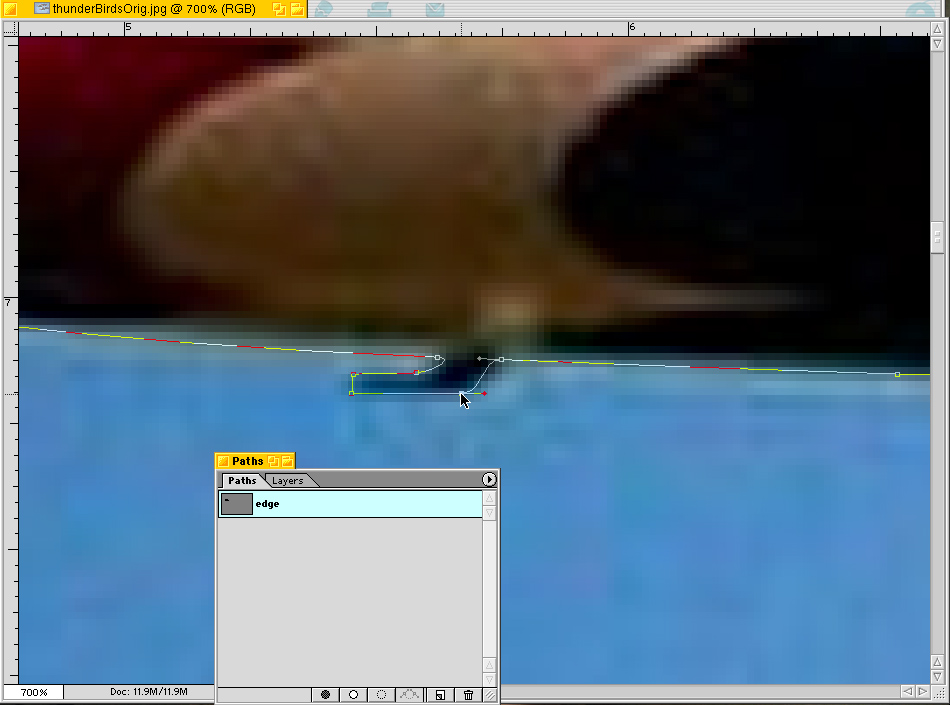
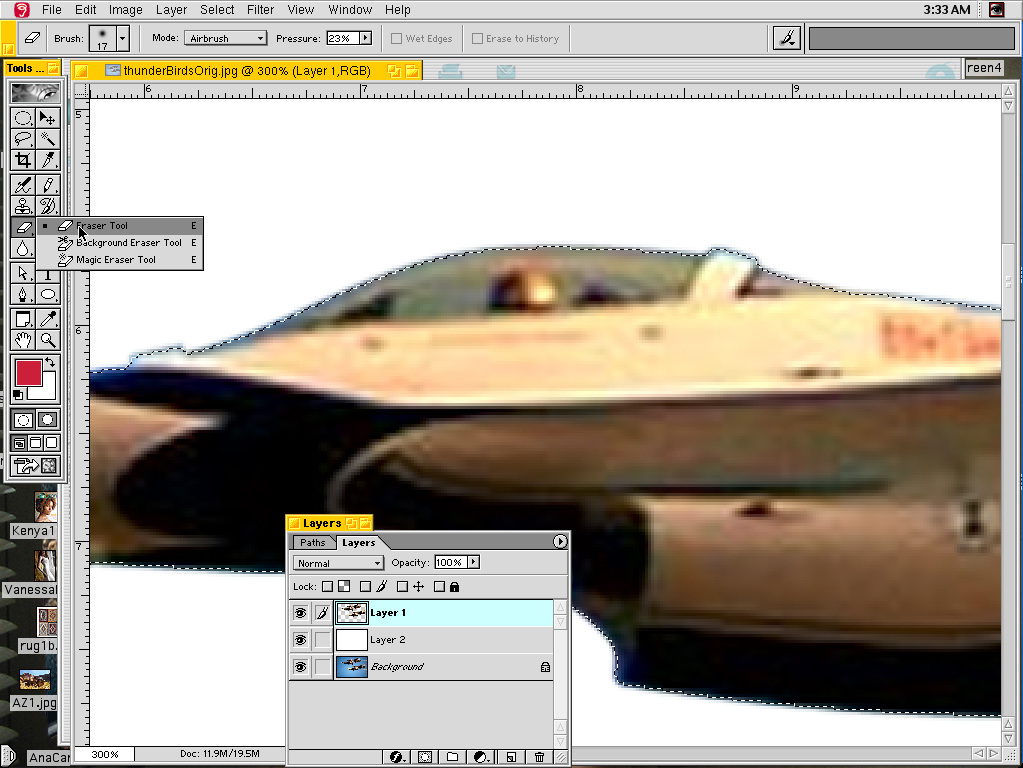
We always name our first and primary path "Edge", this makes it very easy to remember which one we want when you want the entire subject. any other paths we name according to something we will remember within the image when selected. That had just one path, even though it selected out four jets. The second screen shows you how to contract and soften the edge of any image to match the softness of the original. Just click the Thunderbirds2 link above for a complete description of that.
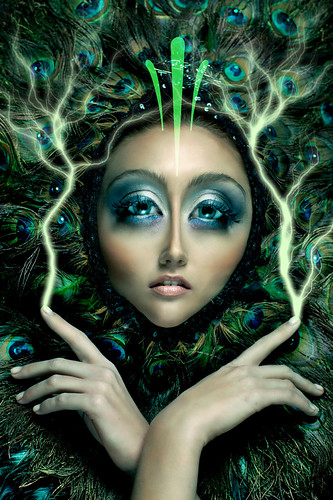
You will also notice in GoldiLoches, that the grid portion blends in very softly. That was very quick and easy, maybe a couple of seconds. Once you have the portion isolated on its own layer, just duplicate it. We lawyas duplicate, because we make mistakes. We just through out the mistakes, then duplicate again and try it again, until we like it. Anyway, with the subject on its own layer use the Lasso Tool to make a very quick selction, and come down on the contours of the body, like when the shoulder blades are. That dips the model into the grid, and its very easy. Have the toll feathered strong, maybe 20-30 pixels. I hit it twice in spots too, this quickly spreads the feather and creates an adjustment in the blends and is more realistic. Just two quick selections instead of one. You never have to be precise at all with a a strong feather applied, as it makes no difference, it is just wasting time, so do it real quick and it helps you get used the feel of doing it as well.
__________________________________________________________


Deanna Cremin Memorial Foundation | Recent Uploads
check out this blog too from the
Deanna Cremin Memorial Foundation:
GrfxDziner.com | Cabin Fever...
http://GrfxDziner.blogspot.com/2010/04/cabin-fever-texturized.html
__________________________________________
Learn how to do it in PicMonkey too…
Stairway to Heaven GrfxDziner.com

![screenPSE328 [3.28.20]](https://live.staticflickr.com/65535/49709878877_e46baa9af1_w.jpg) ]spacer[
]spacer[

 Blogger GrfxDziner | MoonBeam [huey & duey]...
GrfxDziner.blogspot.com/2020/12/moonbeam-huey-duey.html
Blogger GrfxDziner | MoonBeam [huey & duey]...
GrfxDziner.blogspot.com/2020/12/moonbeam-huey-duey.html


![reflectionBC [circa 2004]](https://live.staticflickr.com/43/99634407_686392fef7_m.jpg)
![GrfxDziner group [11-30-2014, Thanksgiving weekend]](https://c2.staticflickr.com/8/7485/15915281425_dfac59fa28_m.jpg)